After the period of visual mobiles and the first tactile experiences, there comes a point when the baby is ready to hold an object intentionally. The Montessori bell rattle belongs to this stage. Unlike the previous materials, which were primarily observed, this is one of the first objects the baby can actively grasp, move, and explore.
Because of this, how the Montessori bell rattle is used becomes especially important. It introduces movement, sound, and coordination at the same time, and these experiences need to remain clear and manageable. When presented with care, it supports a natural shift from observation to action.
The Montessori bell rattle is often the first object the baby can hold and move independently. Unlike earlier materials, where the experience is primarily visual or guided, this is the moment when the baby begins to act directly on an object.
When to introduce the Montessori bell rattle
The Montessori bell rattle is typically introduced around 2.5 to 3 months, when movement begins to change from reflexive to more intentional. At this stage, the baby may start reaching, briefly grasping, or bringing the hands together.
Before this stage, materials such as the Montessori Bell on a Ribbon introduce the first experience of sound linked to movement, while still remaining within a more guided setup. As control over the body increases, tactile materials begin to take their place. As coordination develops further, materials like grasping beads support more sustained and controlled hand movement. The bell rattle builds on these experiences, allowing the baby to hold, move, and explore an object independently.
Understanding when to introduce the Montessori bell rattle ensures that it meets the baby at the right moment, when both interest and physical readiness are present.
What the Montessori bell rattle offers
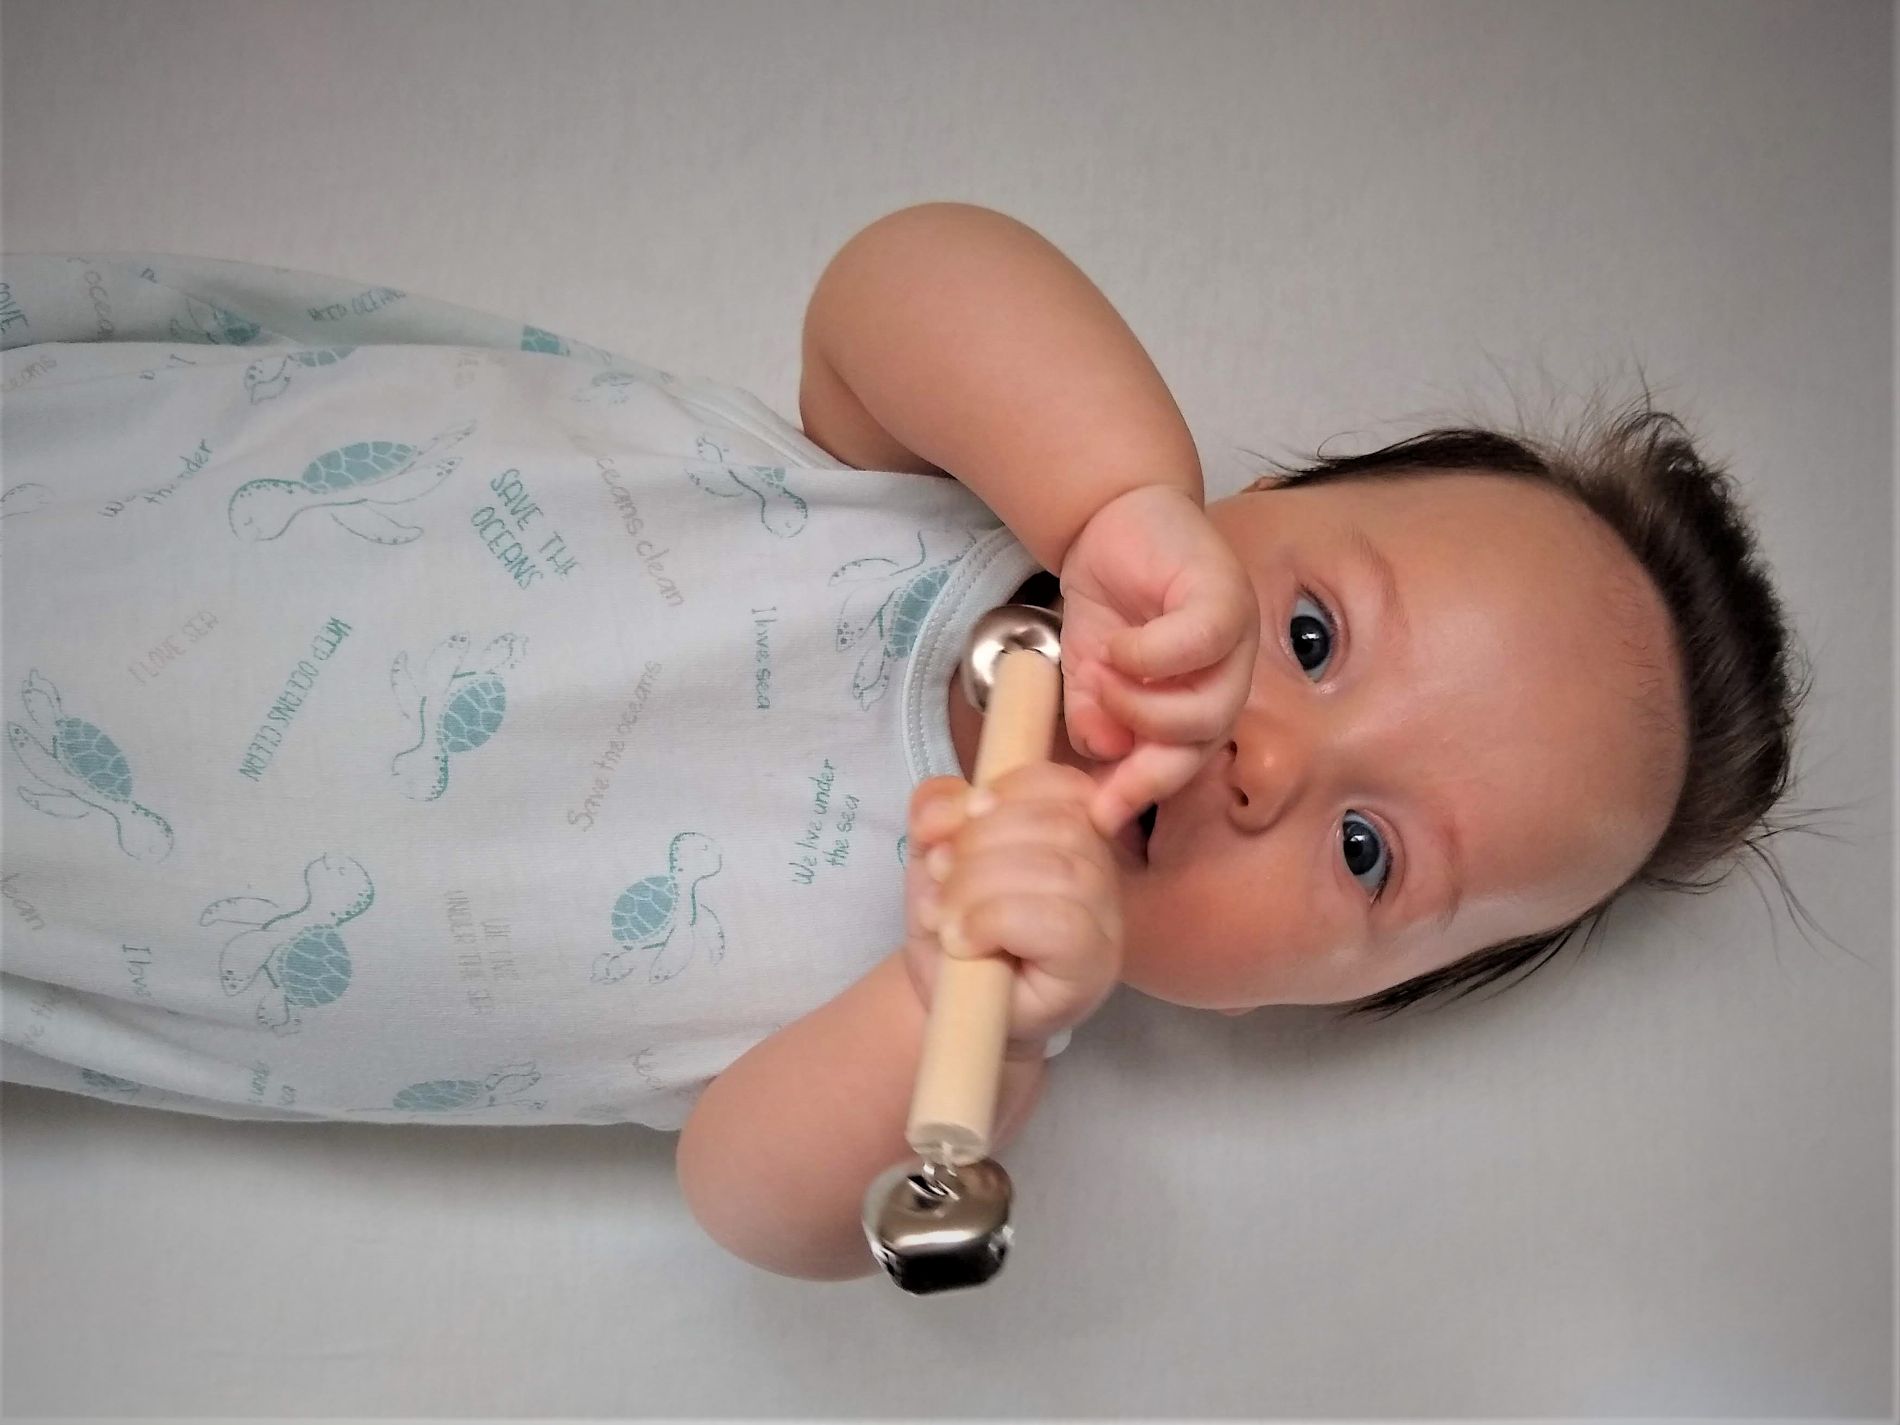
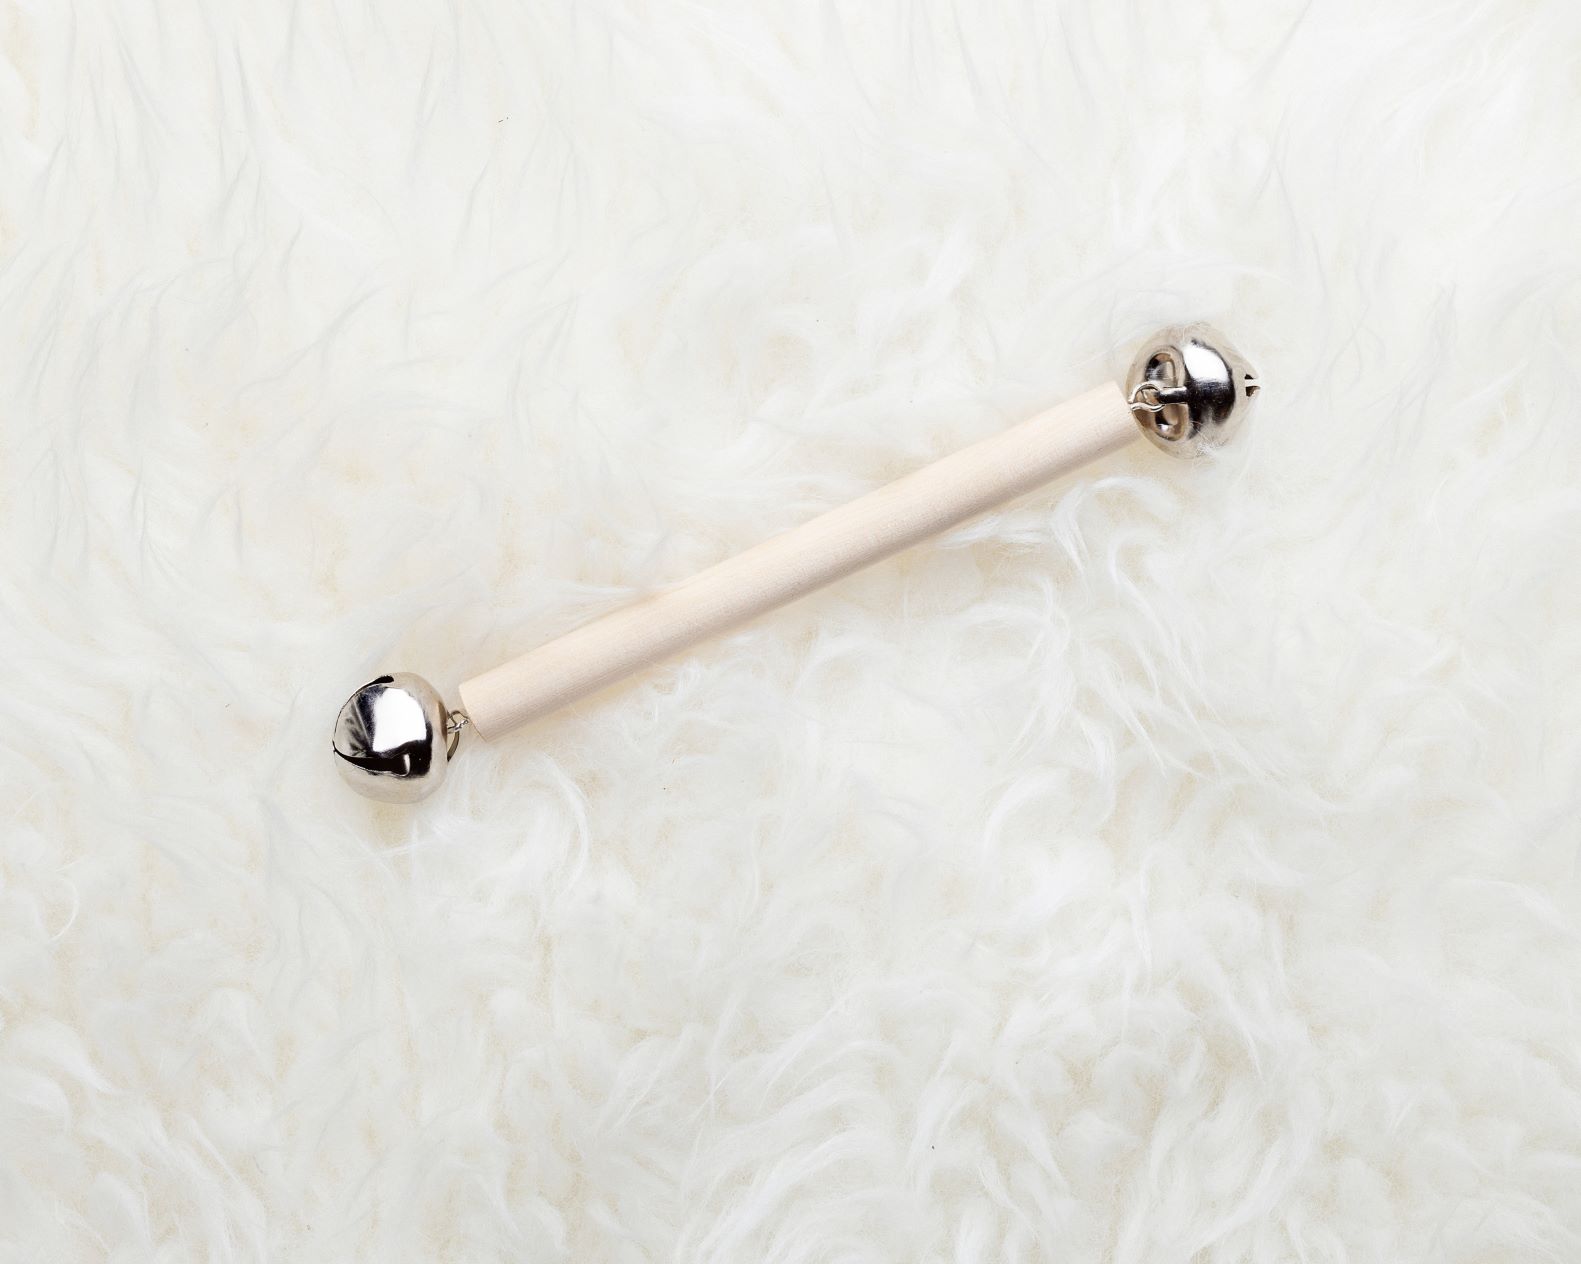
The Montessori bell rattle consists of a simple wooden handle with small bells attached. Its design is minimal, yet each element has a clear purpose. The shape allows for an easier grasp, while the bells produce a soft sound when the object is moved.
What makes the Montessori bell rattle particularly effective is the clarity of cause and effect. When the baby moves their hand, the sound follows. Over time, movements that were initially accidental begin to repeat with intention. This immediate feedback loop is a practical example of action-effect binding in early infancy, where the brain maps the relationship between a motor act and its sensory result.
The visual and auditory elements work together without overwhelming the experience. The baby can see where the sound comes from, gradually building an understanding of their own actions and their effect on the environment.
How to use the Montessori bell rattle
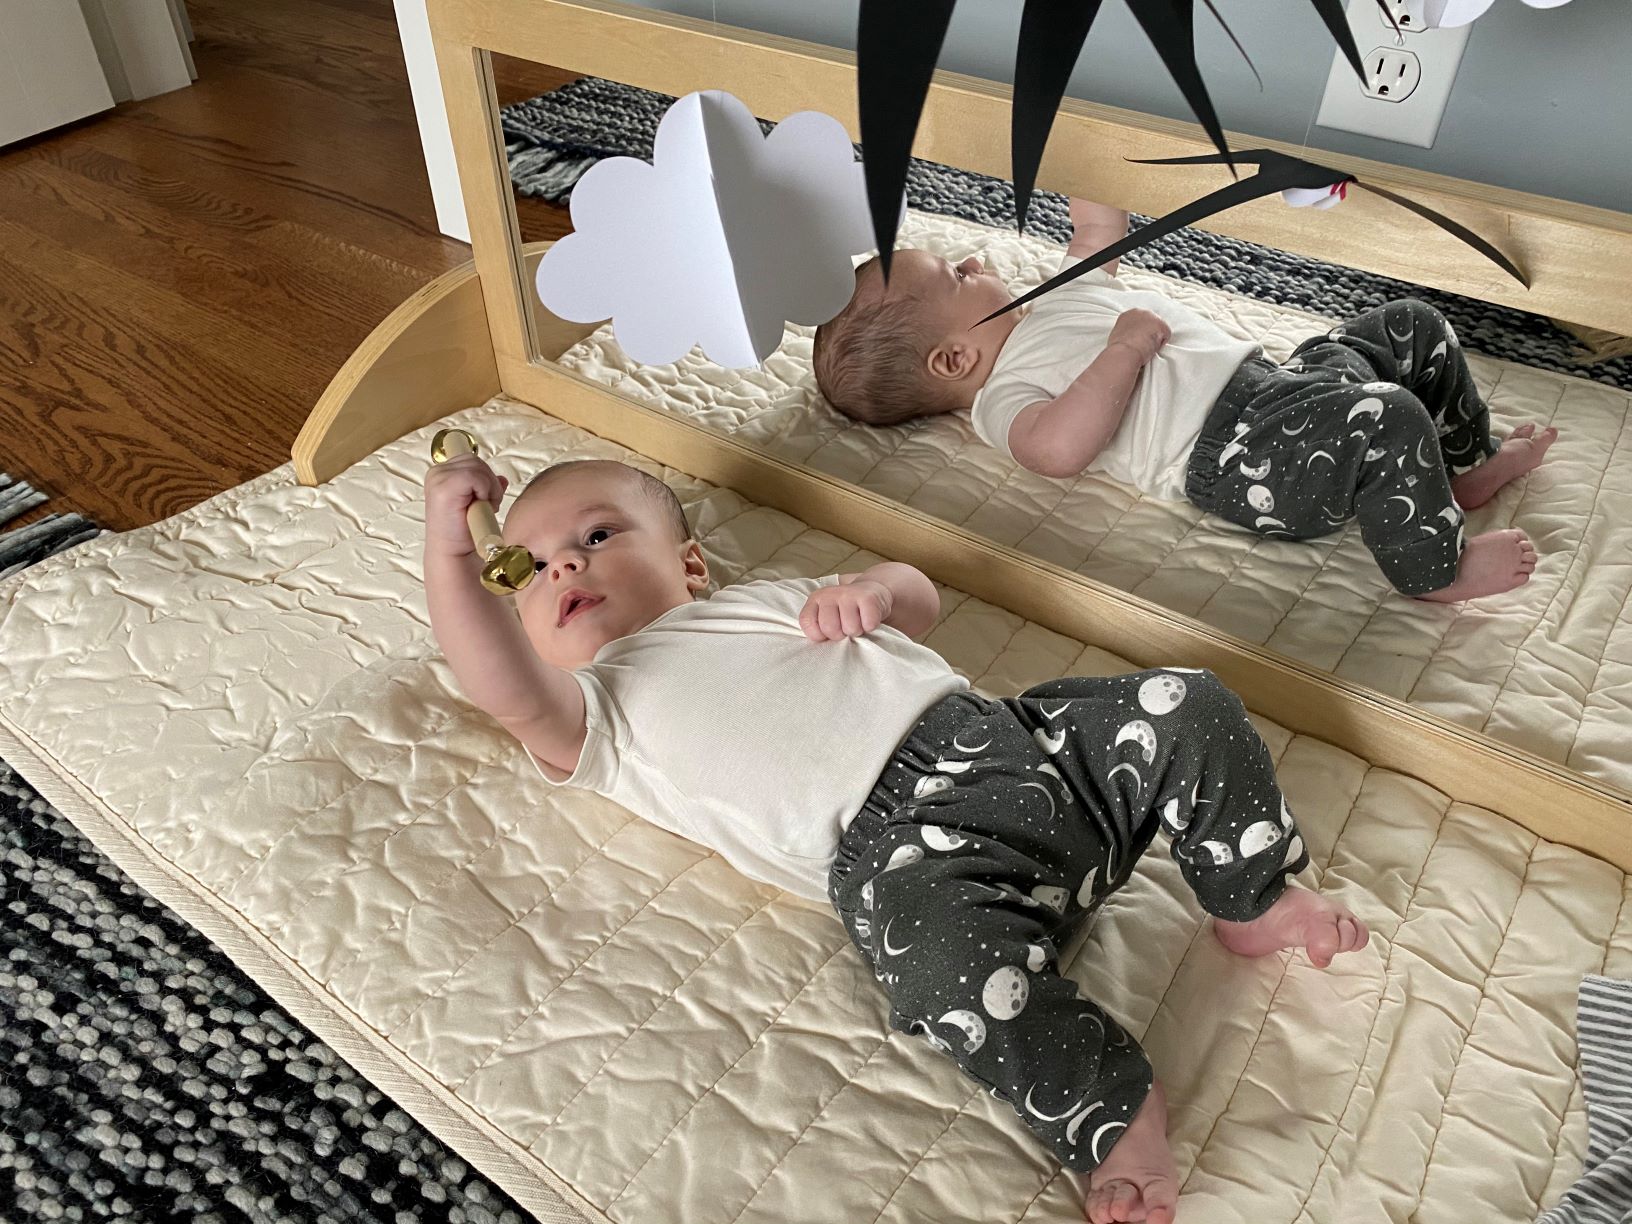
At first, the Montessori bell rattle can be introduced by holding it within the baby’s field of vision and allowing them to notice the sound. A gentle movement is enough. There is no need to exaggerate or repeat it continuously. Once the baby is aware of the object, it can be placed in their hand. In the beginning, it may be held only briefly before being dropped. This is part of the process. Strength, coordination, and control develop gradually through repetition.
Over time, the baby may begin to hold the rattle for longer, move it with more intention, or bring it towards the body. These small changes reflect increasing control and awareness.
As with other Montessori materials, it is not necessary to demonstrate extensively. Offering the object and allowing the baby to explore it freely is often enough.
Safety and supervision
The Montessori bell rattle contains small elements, and for this reason, its use requires consistent and attentive supervision. It should always be used in the presence of an adult and checked regularly to ensure that all parts are secure and intact.
This material is not suitable during the phase when the baby begins to mouth objects. If the baby attempts to bring the bells to their mouth, it is best to remove the rattle and reintroduce it later.
The purpose of the Montessori bell rattle is exploration through movement and sound. Respecting this distinction helps keep its use both safe and appropriate.
Observing development
The Montessori bell rattle offers a clear way to observe how movement becomes more controlled over time. What begins as a brief grasp can develop into longer holding, more coordinated movement, and eventually the ability to transfer the object from one hand to the other.
These changes emerge gradually, through repetition and exploration. Watching this process often reveals more than any structured activity could. The baby is not practising in the way we might expect, but refining movement through experience.
The role of the adult remains the same: to prepare the environment, offer the material, and observe.
A simple material, prepared with care
For parents who prefer to prepare materials themselves, the Montessori bell rattle can be made in a simple way, keeping the design minimal and ensuring that all elements are securely attached. When prepared thoughtfully, it remains aligned with the same principles of clarity and purpose.
A carefully prepared DIY set can also make it easier to follow this stage without needing to source each element separately, while maintaining the same simplicity and intention.
Final Thoughts
The Montessori bell rattle marks an important transition from observation to action. It supports the development of movement, coordination, and early understanding of cause and effect, but only when it is used with attention and care. As control and coordination continue to develop, the next step often includes materials such as the Montessori puzzle ball, which support more complex grasping and movement.
As with all Montessori materials, the bell rattle’s value lies not in how much it does, but in how clearly it allows the baby to experience and understand their own actions.
Further Reading
If you’d like to explore how different Montessori materials support your baby’s development, these articles may also be helpful:
- Baby Sensory Learning
Understanding how babies explore materials through movement, sound, and touch in the first months. - Are Montessori Toys Worth It?
A closer look at what makes a material truly useful, and how to choose with intention rather than quantity.